
How to Squeeze Face Contouring into Your Morning Schedule
Posted on October 10, 2024 Written by: 100% PURE®
Face contouring is one of the few makeup techniques that instantly helps you look put together. Whether you’ve got T-minus 2 minutes to get ready or simply enjoy minimal makeup, contouring exists to enhance and emphasize your best features.
Forget your time restraints! We’ve got a quick and easy contouring routine that works for both airbrushed and natural looks. And, it’s complete with the best contouring tips for different face shapes – plus the top products to contour like a pro, even if you’re a beginner!
Tools for a Quick Contour
Though we’re not currently at the height and hype of the contouring movement, we’re still excited about the idea of a sculpted look. Whether you’re a novice or contour connoisseur, we can guide you to a more sculpted Adonis self – albeit a more natural one than that of years past.
For any kind of face contouring, there are a few basic tools that’ll help carve out your features. It starts with ditching the heavy foundation and concealers and opting for natural, lightweight, wearable contour makeup. With the right products and tools, you can add definition and pizzazz all with a few easy strokes!
Concealer
Concealer highlights and emphasizes the areas you’re contouring – without being as shimmery as an actual highlighter. For highlighting, apply concealer to areas in the middle of your face; think under eyes, forehead, chin, and the bridge of your nose. Remember: When choosing concealer for highlighting, go with one shade lighter.
You can even use a concealer for face contouring; we actually prefer contouring with wand concealers because of their built-in applicators. This means you won’t need a brush to apply product and a brush to buff your contour out – that’s a win for busy lifestyles! For contouring, choose a concealer that’s two shades darker.
Brush
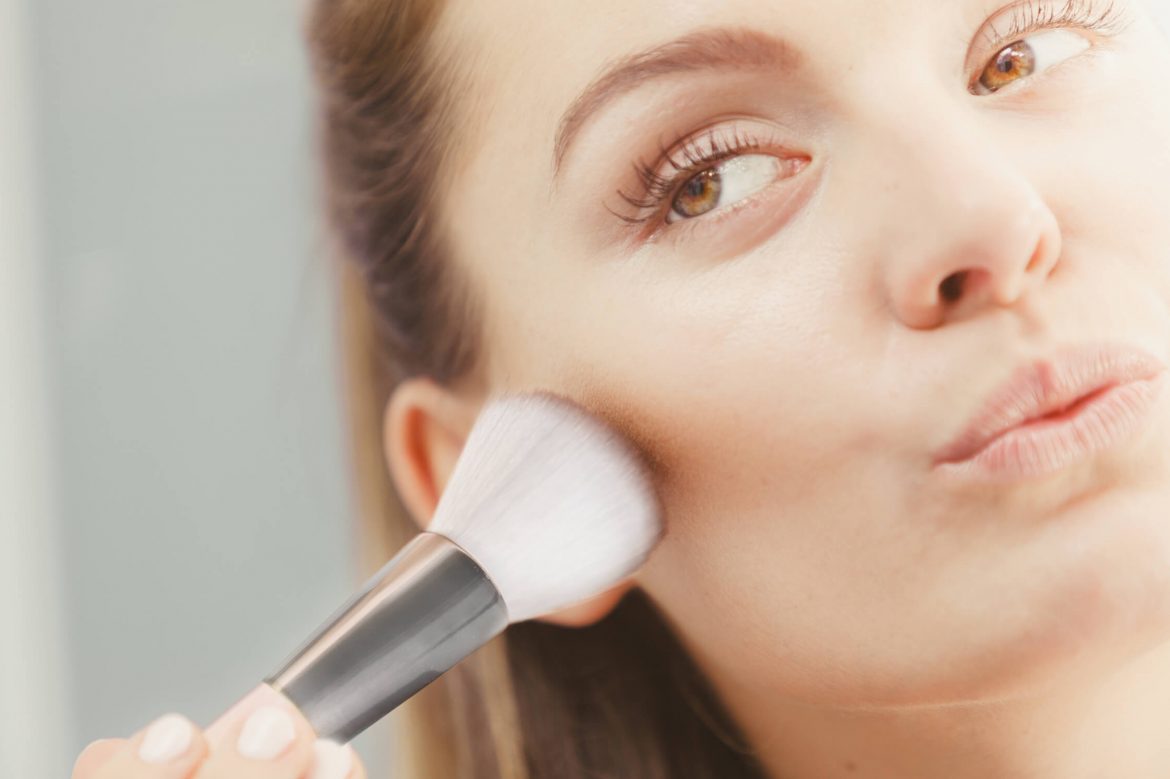
The type of brush you use depends on what areas of the face you’ll include in your face contouring routine. For larger areas – like the forehead and cheeks – use a kabuki brush. Kabuki brushes cover large areas and sport dense bristles. That means you can layer bronzer and blend it out seamlessly. Another option for a fiercer look is to use dense, angled brushes. To sculpt smaller areas, like the nose, use brushes with smaller tips and angled fibers.
A general rule is to use fluffier brushes for more blending action; denser brushes work best for more concentrated color.
You might opt out of brushes entirely and stick to beauty sponges; choose a latex-free makeup sponge
with a tapered end or ridges to contour.
Bronzer
If you don’t use concealer, this is the product that’s going to do the actual face contouring. Choose a bronzer that’s two shades darker than your skin. Since you want your contour to look like a shadow, avoid bronze with shimmer. Save that for your highlight!
Quick Face Contouring Two Ways
Before getting into the actual face contouring, make sure you’re clear on what type of makeup look you’re trying to achieve. While there’s a spectrum of makeup coverage and styles, we’re going to focus on two looks: a “no makeup” look, and a “full face” makeup look.
If followed closely, each technique should take less than 2 minutes!
The No Makeup Look
This look will require less product and more blending for a natural finish. Start at your cheekbones and place dots of bronzer where your natural shadows fall. A dotted line is easier to blend out naturally versus a straight line – this also saves you a bunch of blending time.
If you’re using a powder or cream product, brush your mid-sized makeup brush lightly over your cheeks, temples, and jawline.
To buff out, use a large fluffy brush or the round end of a beauty sponge. Without adding extra product, take your contour up to your temples and use your tool along your jawline.
For the highlighting step, dab a few dots of concealer under the eyes and on the tops of your cheekbones. Blend it out and voila!
The Full-Face Makeup Look
This look uses more product but results in a more sculpted effect. Draw lines where your natural shadows fall and where you want more definition; focus on your cheekbones, forehead, and nose for the most payoff.
If you’re using a powder or cream product, use a dense, angled brush to emphasize your features. Buff those lines out until they’re no longer harsh. Use some concealer on your forehead, under your eyes, and in the middle of your nose for the most contrast. After blending the product in, your contour is done!
Contouring for Different Face Shapes
Let’s ‘face’ it, the shape of our face – like our fingerprints – are unique attributes that tell a thing or two about our beautiful selves. In fact, your face shape plays a major factor in helping you better understand how makeup placement can create different effects – and that includes contouring!
Depending on your specific beauty goals, determining your face shape helps you understand how to apply contour and highlight more easily to enhance your best features. It also allows you to emphasize certain angles and curves of your face, or de-emphasize areas you’d prefer to minimize.
Now you might be thinking that’s great, but which one do I have? Grab a mirror and read on as we describe the basic face shapes and how to contour for your unique shape!
Diamond-Shaped Face
You know what they say – diamonds are a girl’s best friend. In this case, we mean that almost literally, as this is one of the face shapes with the best natural angles to work with. You know that you have a diamond-shaped face if your cheeks or cheekbones are the widest point of your face, while the width of your forehead and jawline are slightly narrower.
Here are some characteristics of a diamond-shaped face and how to contour it for a smooth, makeup artist-like blend for a seamless finish.
Key Features:
Slightly pointed chin
Longer than wider face
High cheekbones
Hairline is narrower than cheeks
Makeup Goals:
Add fullness to jaw and forehead
Minimize cheek width
How to Contour a Diamond Face:
1. Select your usual foundation shade and apply it as you normally would.
2. Choose a foundation that is a few shades darker than your skin tone or use a bronzer. Use the darker foundation shade (or bronzer) and apply it with a mid-sized makeup brush to the area below your cheekbones, only going halfway. Make sure to thoroughly blend so it doesn’t look unnatural.
How to Highlight a Diamond Face:
1. Select a foundation shade that is 1-2 shades lighter, or use a highlighter if you would like a shimmery, luminous look.
2. Apply the lighter foundation or highlighter under your eyes. Draw an upside-down triangle for an extra brightening effect.
3. Brush in the middle of your forehead as well as the middle of your chin. This is where light naturally hits on a diamond face and will help broaden these areas.
4. Add a pop of color to your cheeks with our Fruit Pigmented Blush: Berry. If you’d like to tone down the flush, dab a little highlighter on top to tone it down.
Heart-Shaped Face
A heart-shaped face – think Reese Witherspoon – is just as cute as it sounds, and is one of the most easily identified. The most common characteristics are a face that’s widest in the middle (near the cheeks), along with a pointed chin.
Here are some characteristics of a diamond-shaped face and how to contour it for a smooth, makeup artist-like blend for a seamless finish.
Key Features:
Slightly pointed and narrow chin
Widow’s Peak
Forehead is the widest part
Makeup Goals:
Balance forehead to chin
Play up high cheekbones
How to Contour a Heart Face:
1. Select your usual foundation shade and apply it as you normally would.
2. Choose a bronzer or foundation that is a few shades darker than your skin tone. Use the darker shade and apply it with a mid-sized makeup brush to the sides of your forehead, and temples to help balance your narrow lower half to the wider upper half of your face. Other key areas to hit for contouring are your cheekbones, making sure to end halfway as well as the center of your chin to help soften the point of the heart. Make sure to thoroughly blend so it doesn’t look unnatural.
How to Highlight a Heart Face:
1. Select a foundation shade that is 1-2 shades lighter, or use a highlighter if you would like a shimmery, luminous look.
2. Apply the lighter foundation or highlighter under your eyes. Draw an upside-down triangle for an extra brightening effect.
3. Brush in the middle of your forehead as well as the middle of your chin. This is where light naturally hits on a heart-shaped face and will help broaden these areas.
4. Add a pop of color to your cheeks with our Fruit Pigmented Lip & Cheek Tint: Pink Grapefruit Glow. If you’d like to tone down the flush, dab a little highlighter on top to tone it down
Oval-Shaped Face
An oval face shape is narrow, elongated, and elegant. They’re sometimes 2x longer than they are wide, have no pointed features, and have a narrow chin. You won’t see the squared jaw or forehead as you would with rectangular faces.
Here are some characteristics of an oval-shaped face and how to contour it for a smooth, makeup artist-like blend for a seamless finish.
Key Features:
No pointed features
Face is 1.5x longer than wide
Slightly upside down egg-shaped
Makeup Goals:
Add depth to cheekbones
Play up balanced face shape
How to Contour an Oval Face:
1. Select your usual foundation shade and apply it as you normally would.
2. Choose a bronzer or foundation that is a few shades darker than your skin tone. Use the darker shade and apply it with a kabuki brush or a mid-sized makeup brush to the sides of your forehead, helping to appear narrower. Also apply it below your cheekbones, ending halfway. Make sure to thoroughly blend so it doesn’t look unnatural.
How to Highlight an Oval Face:
1. Select a foundation shade that is 1-2 shades lighter, or use a highlighter if you would like a shimmery, luminous look.
2. Apply the lighter foundation or highlighter under your eyes. Draw an upside-down triangle for an extra brightening effect.
3. Brush in the middle of your forehead as well as the middle of your chin. This is where light naturally hits on an oval-shaped face and will help broaden these areas. Finish with lightly applying under your eyes and brow bone to brighten under your eyes.
4. Add a pop of color to your cheeks with our Fruit Pigmented Blush: Chiffon. If you’d like to tone down the flush, dab a little highlighter on top to tone it down.
Rectangle-Shaped Face
You’ll know you have a rectangular face shape if the widths of your forehead, cheeks, and jawline are all relatively parallel. Your face will be longer than it is wide with softened features like a rounded jawline.
Here are some characteristics of a rectangle-shaped face and how to contour it for a smooth, makeup artist-like blend for a seamless finish.
Key Features:
Square jawline
Face is longer than wide
Width of hairline and jaw even
Makeup Goals:
Soften corners of face if they are more squared off
Define cheekbones
How to Contour a Rectangle Face:
1. Select your usual foundation shade and apply it as you normally would.
2. Choose a bronzer or foundation that is a few shades darker than your skin tone. Use the darker shade and apply it with a kabuki brush or a mid-size makeup brush to the sides of your hairline, helping your face appear narrower. Also apply it along your hairline, under your jawbone to create a narrow illusion and cheekbones only going halfway. Make sure to thoroughly blend so it doesn’t look unnatural.
How to Highlight a Rectangle Face:
1. Select a foundation shade that is 1-2 shades lighter, or use a highlighter if you would like a shimmery, luminous look.
2. Apply the lighter foundation or highlighter under your eyes. Draw an upside-down triangle for an extra brightening effect
3. Brush in the middle of your chin. This is where light naturally hits on a rectangle-shaped face and will help broaden this area. Finish with lightly applying under your eyes and brow bone to brighten under your eyes.
4. Add a pop of color to your cheeks with our Fruit Pigmented Lip & Cheek Tint: Shimmery Cocoa Berry. If you’d like to tone down the flush, dab a little highlighter on top to tone it down.
Round-Shaped Face
We love round things: donuts, boba pearls, the moon – and of course, lovely round faces! If you have a round face shape, the width and the length of your face are approximately the same. Soft facial features like a rounded jawline can lend to a more youthful look.
Here are some characteristics of a round-shaped face and how to contour it for a smooth, makeup artist-like blend for a seamless finish.
Key Features:
No pointed features
Face is long as it is wide
Rounded cheeks
Makeup Goals:
Add angles and depth to cheekbones
Create structure
How to Contour a Round Face:
1. Select your usual foundation shade and apply it as you normally would.
2. Choose a bronzer or foundation that is a few shades darker than your skin tone. Use the darker shade and apply it with a kabuki brush to the sides of your forehead and along your temples to give the appearance of narrowness. Also apply to the areas below your cheekbones, only going halfway, using a curved line to your jawline to help lengthen your face. Make sure to thoroughly blend so it doesn’t look unnatural.
How to Highlight a Round Face:
1. Select a foundation shade that is 1-2 shades lighter, or use a highlighter if you would like a shimmery, luminous look.
2. Apply the lighter foundation or highlighter under your eyes. Draw an upside-down triangle for an extra brightening effect.
3. Brush in the middle of your forehead and cheekbones. This is where light naturally hits on a round-shaped face and will help broaden this area. Finish by lightly applying it under your eyes to brighten.
4. Add a pop of color to your cheeks with our Fruit Pigmented Blush: Pretty Naked. If you’d like to tone down the flush, dab a little highlighter on top to tone it down.
6 Quick Contour Tips
We’ve covered a few basic tools and the right products that will help carve out your best features. Let’s uncover the best tips to use this nifty beauty skill!
#1 – Choose a concealer that’s easy to blend and stays put throughout the day. Less reapplying equals less time wasted.
#2 – If your tools are dirty and you’re in a time crunch, use your fingers – but make sure they’re clean!
#3 – If you have an oilier skin type, quickly set your contour with a layer of translucent powder for long-lasting wear.
#4 – A kabuki brush is a great multi-tasker and time saver – you can contour and buff in two swift steps.
#5 – Instead of layering on lots of products, start by adding less product and building up as needed. If you overapply, you’ll be left blending for ages – it’s always easier to add than to take away!
#6 – For best results, make sure your face contouring tools are always clean and ready for you to use. Preparation is key when it comes to managing busy schedules!
100% PURE Products to Incorporate into Your Contour Routine
Your facial structure is largely a result of your genes, the underlying bones, and how your muscles sit. While no makeup tools can completely alter these fundamentals, there are some products that can enhance and emphasize your best features or conceal your less likeable features.
Non Latex Makeup Blender
The tools we use are the most important factor in achieving that seamless, blended look, so we at 100% PURE decided to create our own Non-Latex Makeup Blender. Even though there are so many blenders out there on the market, we wanted to switch it up and offer everyone a high-quality, multi-purpose non-latex option that blends like a dream. The makeup blender is not only safe and effective, but it creates a true-to-skin finish with its unique, seamless texture and feel.
Mattifying Primer
Lasting power in a soft matte finish? Look no further. Crafted with light, hydrating, and balancing ingredients like green tea, tea tree, and aloe, the Mattifying Primer creates an airbrushed finish without compromising moisture or weighing down the skin. It features seaweed collagen, which plumps the skin for a youthful look while filling in fine lines and wrinkles.
Fruit Pigmented® Full Coverage Water Foundation
Our makeup blender works best with liquid and cream makeup to give you that lovely, dewy finish. For example, our latex-free sponge and Full Coverage Water Foundation are a match made in heaven! The moisture content of this foundation is through the roof, with soothing aloe juice and vegetable glycerin for supple skin. Simply add a squeeze of product to the bulb end of the sponge and bounce onto the skin until you get your desired coverage.
Conclusion
No matter your time constraints or coverage preference, contouring can still be a part of your routine – you only need a few key steps to get it right! Once you recognize your face shape, what your best features are, and what you want to enhance, face contouring might just become the smoothest, quickest part of your morning routine.
Hopefully, with these surefire steps on how to quickly contour and the right products to enhance your best features, you’ll feel excited about the notion of contouring – and more excited to try the famed chisel look for yourself.
Whether you contour on nights out or in your AM routines, face contouring is a great technique to have in your repertoire. Its versatility means you can go from soft to dramatic in minutes or “no makeup” to a full-face makeup look in a pinch. The contour line is the limit!
Frequently Asked Questions About Face Contouring
Can you contour your face with just concealer?
Yes, you can use concealer to contour your face, but you’ll need to choose the right concealer and technique. Select a concealer that’s 2–3 shades darker than your skin tone and has the same undertones. Apply the concealer using a makeup blender or brush to areas that would naturally have shadows. Apply concealer to areas like your temples, under your cheekbones, the bridge of your nose, and your jawline. Be sure to blend using a makeup brush and blend in circular motions to avoid any harsh lines.
What is the difference between contouring for a “no makeup” look and a full-face look?
When contouring for a “no makeup” look, the key difference is using significantly less product and blending it much more subtly, creating a very natural shadow effect, A no makeup look uses a light-handed application of a bronzer or a dedicated contour shade that closely matches your skin tone.
A full-face contouring look involves more defined lines and a noticeable contrast between light and dark shades to dramatically sculpt the face, often with heavier application and sharper lines; essentially, a “no makeup” contour is much subtler and integrated into the skin tone, while a full-face contour is more pronounced and deliberate.
How do you contour quickly when you’re short on time?
We know time is of the essence, but for the best contour results start with a good skincare routine. A great skincare routine can help your makeup and contour look better. You can cleanse, exfoliate, moisturize, and apply serum to target specific concerns.
To contour your face quickly, you can try these steps:
#1. Locate your cheekbones. Suck in your cheeks to find the hollows of your cheeks. You can also use a brush to help identify where your cheekbones are.
#2. Apply contour along your cheekbones, starting at your hairline and working down. You can also apply contour to your jawline and forehead.
#3. Blend the contour upwards to lift your face and create a sharp look. Blend outwards on your forehead towards your hairline.
#4. Apply highlighter to areas of your face you want to draw attention to, such as under your eyes in an upside-down triangle shape. You can also highlight the middle of your forehead and chin to make them look wider.
As we covered earlier, consider your face shape when it comes time to contour and highlight it. This will give you the best results and bring out your loveliest features.
Can you contour without using a brush or beauty sponge?
Yes, you can contour without using a brush or beauty sponge, by simply using your clean fingers to apply and blend the contour product; however, achieving a precise and seamless finish is much easier with a dedicated brush or sponge, as they help with controlled application and blending.
How can I make my contour last all day?
To make your contour last all day, start by using a primer to create a smooth base for your contour makeup and help it adhere better. Opt for using a cream contour and then set it with a translucent powder, using a light hand to avoid over-application; then finish with a setting spray to lock everything in place; this layering technique ensures your contour stays put throughout the day.
Whether contouring is all the top beauty hype or signaling you out on your For You page, the face slimming-feature highlighting trend is here to stay. Hopefully, with these surefire steps on how to contour and the right products to enhance your best features, you’ll feel less intimidated about the notion of contouring.